Photo2shape
Photo2shape analyzes a collection of geotagged images or photos and creates a vector layer, containing their location and some additional information extracted from the EXIF tags.
Installation
The plugin is available via my repository.
Prerequisites
Photo2Shape has an optional dependency — exifread — a Python module to extract EXIF metadata. This dependency is only needed for running the “Import photos (exifpy)” algorithm. Please install exifread >= 3.2.0 in your Python environment before using this algorithm:
- Windows: run the OSGeo4W Shell and install the
exifreadpackage usingpip. - Linux: install the corresponding package via your distribution’s package manager.
- macOS: install the
exifreadpackage into the QGIS Python environment usingpip.
To install it, please follow these steps (for more details, see the QGIS User Guide):
- Start QGIS.
- Go to Plugins → Manage and Install Plugins….
- Go to the Settings tab and click Add… to add a new repository.
- Enter repository name, e.g. “Alex Bruy’s plugins”.
- Enter the repository URL https://plugins.bruy.me/plugins.xml.
- Click OK to close the Repository details dialog.
- Go to the All tab.
- Search for Photo2Shape, select the plugin in the list and click Install Plugin.
Usage
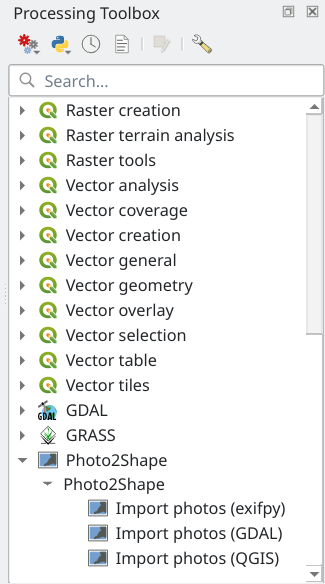
Once installed and enabled, Photo2Shape is registered as a Processing provider and its algorithms are added to the Processing toolbox under the “Photo2Shape” group.
The plugin provides three algorithms to import geotagged photos. The algorithms share the same parameters and differ only in the backend used to process EXIF metadata. These backends are:
- QGIS: uses QGIS API, which in turn relies on the
exiv2library. This backend is available when QGIS is built with Exiv2 support. Official installers and packages for major Linux distributions include Exiv2 support. This backend supports a wide range of image formats. - GDAL: uses GDAL. This backend is always available and supports JPEG, JPEG XL, TIFF.
- exifpy: requires
exifread>= 3.2.0 installed in the QGIS Python environment. This backend supports the following formats: AVIF, TIFF, JPEG, JPEG XL, PNG, WebP, HEIC/HEIF, RAW.
The main difference between backends is in image format support and handling missed EXIF GPS tags, for example, GDAL backend treats 0/0 direction as 0 while QGIS and exifpy backends treat this value as no direction (NULL). Similar discrepancies can occur with other EXIF tags. Besides this minor difference, all algorithms work in the same way.
Open the algorithm’s dialog by double-clicking on the desired tool in the Processing toolbox.
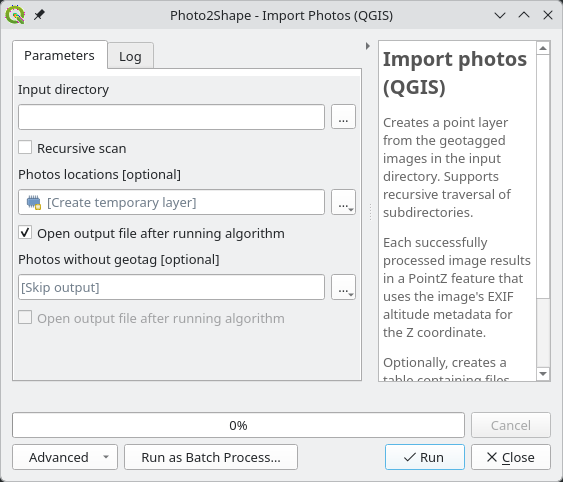
Select a directory with the images in the “Input directory” selector. You can also drag-and-drop files from the file manager to this widget. If images are organized in subdirectories, and you want to process them all, please activate the “Recursive scan” checkbox, otherwise only the top-level directory will be processed.
By default, the algorithm create one output called “Photos locations”: the point vector layer containing images locations. Use the “Photos locations” selector to specify where you want to save this layer or leave it empty to produce temporary scratch layer. The output vector layer will contain a PointZ feature for each successfully processed image and with the altitude metadata used for the Z coordinate. In addition to the geometry, the output layer will contain the following attributes:
full_pathfull path to the imagedir_namedirectory path of the imagefile_nameimage file namelongitudeimage location longitude in decimal degreeslatitudeimage location latitude in decimal degreesaltitudeimage location altitude if availablenorthreference used for giving the bearing to the destination point. “T” means true direction and “M” is magnetic directionazimuthazimuth to the destination pointgps_dateGPS date and time informationimage_dateimage date and time information
Photo2Shape automatically applies style and assigns editor widgets to some attributes to allow better UX when using layer and its attribute table. Namely the “full_path” and “dir_name” fields will use the “Attachment” editing widget with matching settings, the “gps_date” and “image_date” fields will use the “Date/Time” widget.
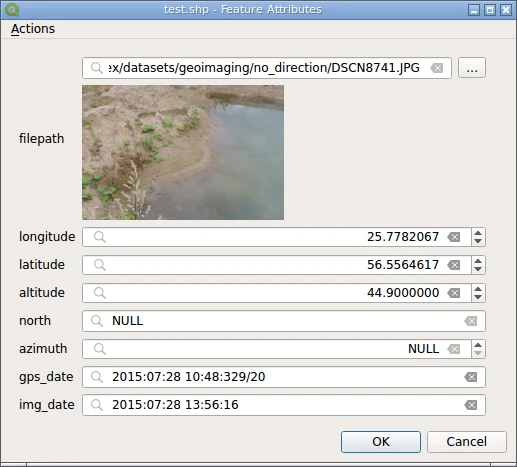
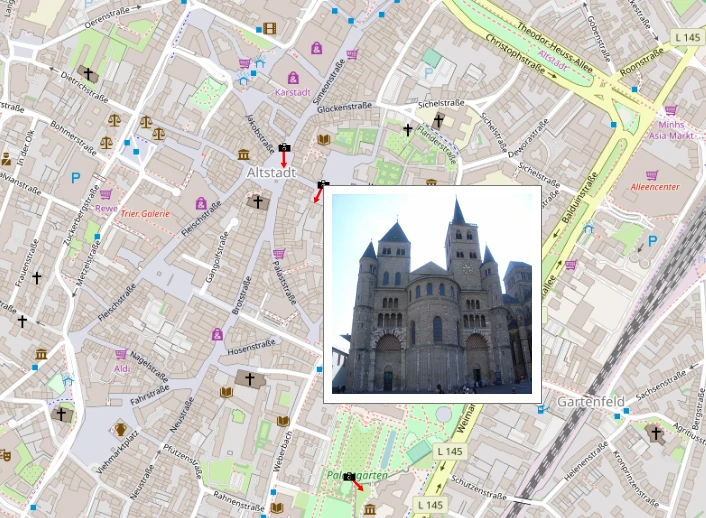
Also if map tips are enabled, it is possible to view a photo preview by hovering mouse cursor over a point.
If “Photos without geotag” output is enabled, the algorithm also produces a table with information about images which were not processed. This table has following fields:
full_pathcontaining full path to the imagedir_namecontaning a directory path of the imagefile_namecontaining an image file nameerrorwith the reasong why this image was not proceesed
The rest of the functionality, like support for various output formats, saving to database, appending to an existing file, etc. is identical to other Processing tools. Please refer to the QGIS User Guide to learn more about Processing and how to use it.
Reporting bugs
Please report bugs and submit feature requests via bugtracker.