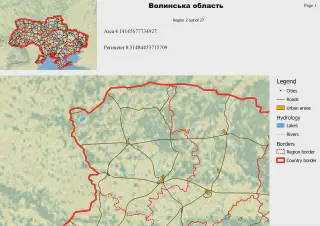
Creating atlases in QGIS
11.10.2012 08:33 · GIS · qgis, howto
As I wrote before, Oslandia kept their promise, and during the 8th QGIS developer meeting, the Atlas plugin was integrated into the QGIS print composer. This has been made possible thanks to the financial support (although not the full amount has been raised) of the following individuals and organisations:
- Agence de l’eau Adour-Garonne
- City of Uster, Switzerland
- Spencer Gardner
- Giovanni Allegri
- John C. Tull
- Bill Williamson
- Ujaval Gandhi
The workflow remains the same: create a print layout and specify a coverage layer that will be used to generate the atlas. In addition, it is now possible to create complex labels using the full power of QgsExpression and the attributes of the coverage layer.
Let’s go through the process of making an atlas step by step.
Creating a project
The first step is to prepare the project: add all the necessary layers, adjust the symbology and labels, etc. For this example, I used data from NaturalEarth.
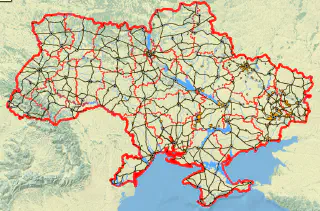
Coverage layer
This is a layer that defines the boundaries of the areas to be printed. In other words, for each feature in the coverage layer, an output file is created containing a portion of the map covered by that feature. Although all types of geometry are supported, for obvious reasons, it is best to use polygon layers as the coverage layer.
A cover layer can contain any number of attributes with arbitrary names.
I created my coverage layer using the ‘Polygon from layer extent’ tool. I used a layer with administrative boundaries as the input layer, with the “Calculate extent for each feature separately” option set to “Yes”. The output is a polygon layer with 27 features (corresponding to the number of features in the input layer). I also added an attribute with the names of the administrative units.
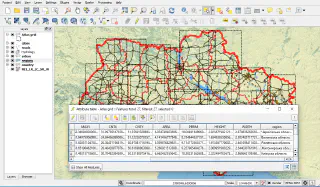
Atlas template
Now it is time to create the atlas template in Print Composer. Do not be intimidated by the word “template” — this is a normal print layout.
My layout looks like this
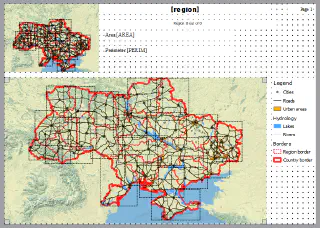
The large map shows the information corresponding to each feature in the coverage layer, and the second, smaller map is an overview map. There is also a legend and several labels: page number, name of the administrative unit, area and perimeter of the bounding rectangle, and atlas feature counter.
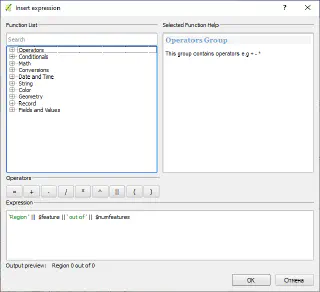
A few words should be said about labels. They can now contain QgsExpression expressions and use data from the coverage layer attributes. Several special functions have also been added:
$featureand$numfeaturesto return the consecutive number of a current atalas feature and the total number of features in a coverage layer, respectively$pageand$numpagesto print the current page number and the total number of pages in the atlas, respectively
Creating an atlas
The first thing you need to do is find out the identifier of the map for which the atlas is being created. This is done by hovering over the map and waiting for a tooltip to appear with the information you need. In my case, it is “Map 0”.
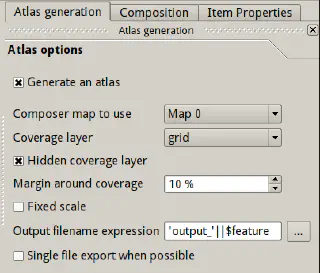
Switch to the “Atlas generation” tab and start configuring:
- in the “Composer map” combobox, select the map for which the atlas will be created
- select the coverage layer in the “Coverage layer” combobox
- to disable the drawing of the coverage layer, check the “Hidden coverage layer” checkbox
- the “Margin around coverage” field allows you to control the width of the overlap area (useful when gluing large maps printed on small sheets)
- the “Fixed scale” checkbox, as the name suggests, forces the use of a fixed map scale for all features in the coverage layer. When features are drawn, they are centred within the map. It is up to the user to select the correct scale
- In the “Output filename expression” field, we should specify the pattern to be used for the output atlas files. All features of
QgsExpressionare supported - The “Single file export when possible” checkbox needs no further explanation. Just note that this feature is currently only supported when using PDF as the output format
That’s it. All that remains is to specify the output directory.
